In the first part, we set up the server. Now the system needs to see the house: learn to understand who is home and take control of the most expensive subsystem — energy.
Working with Configuration
Home Assistant is configured in two ways: through the interface and through YAML files. Integrations are added with a mouse, but template sensors, variables, and some automations live in files. You need to edit them in a strict order — otherwise, sooner or later, you will end up with a system that won't start.
- Backup. Before editing, every time.
- Editing in the config editor.
- Configuration check:
Developer Tools → YAML → Check Configurationor the commandha core checkin the terminal. - Only after a successful check — restart. An error in YAML will prevent the system from booting, and you'll have to fix it via SSH.
File Structure
| File | What's inside |
|---|---|
configuration.yaml | Main file: component connections, template sensors, helper variables |
automations.yaml | Automations (also editable via the interface) |
scripts.yaml | Scripts — sequences of actions called from automations and buttons |
secrets.yaml | Passwords, keys, tokens. Other files refer to them via !secret name |
Three rules that save hours:
- No duplicate root keys in
configuration.yaml. A secondsensor:will not be added to the first — it will overwrite it, and some entities will silently disappear. - All secrets — in
secrets.yaml. Not for neatness, but so that the config can be shown or put into a repository. - Set
input_numberhelper variables without theinitialparameter. With it, the value resets on every restart — and your configured thresholds revert to factory settings at the most inconvenient moment.
HACS — Community Store
Some necessary integrations and almost all beautiful cards for dashboards live not in the core, but in HACS (Home Assistant Community Store). It's installed once, then components are added in two clicks.
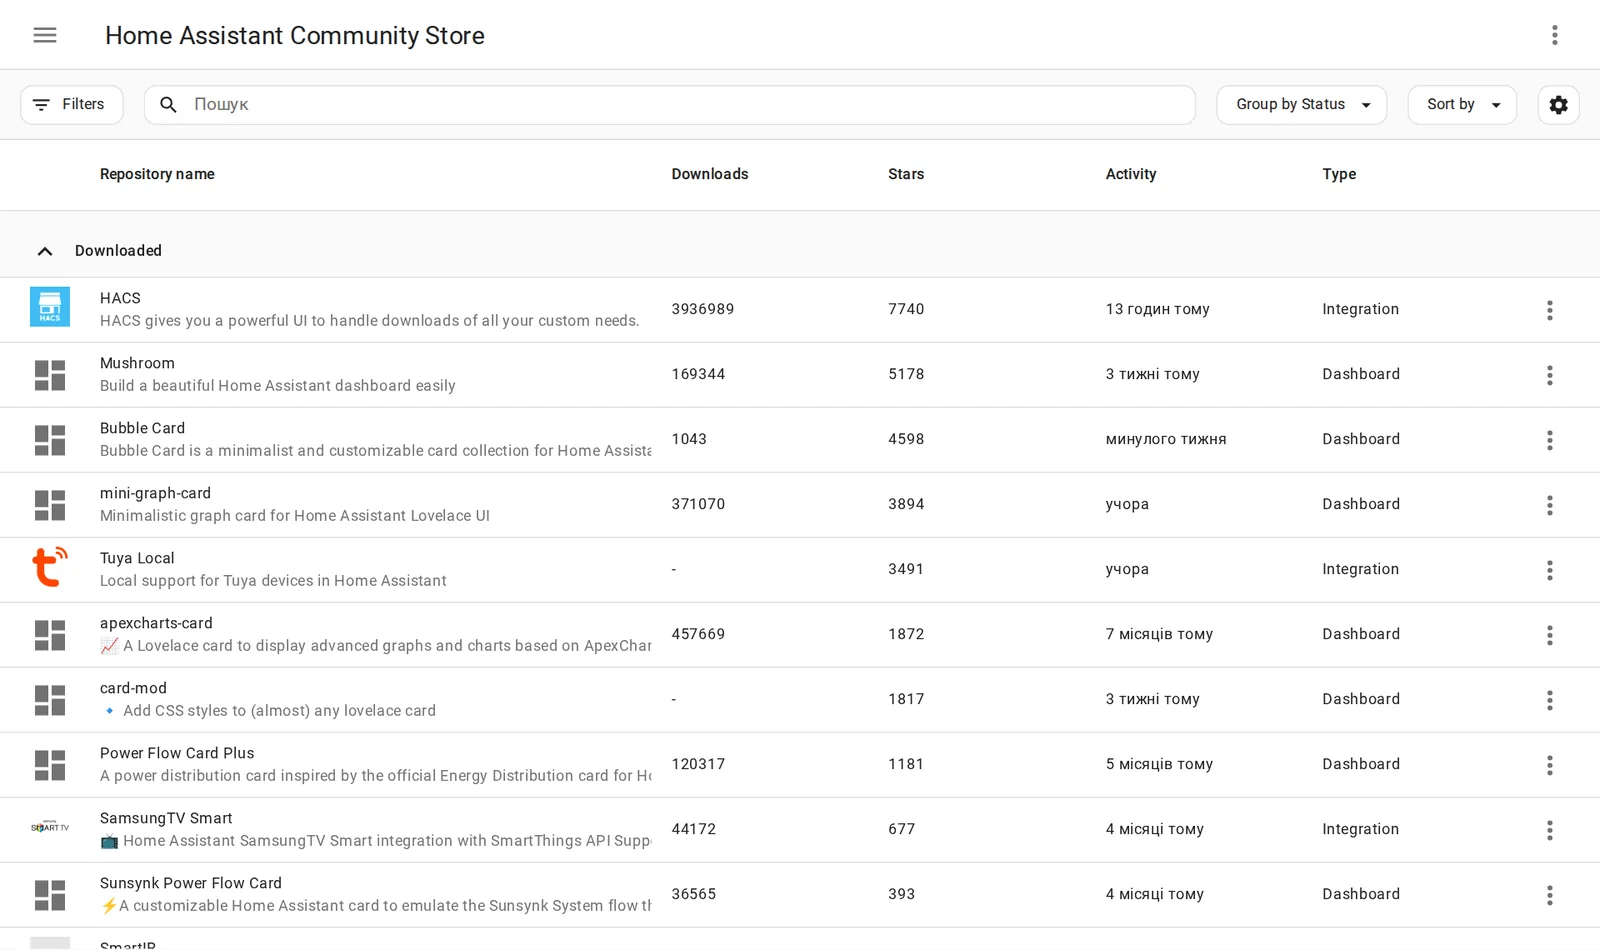
Without HACS, you won't get, for example, proper cards for visualizing energy flows, a template thermostat, or local control of Wi-Fi devices bypassing the cloud. Install it immediately after basic setup.
Hygiene rule: every component from HACS is foreign code in your system. Install only what you truly need, and check the repository's last update date.
MQTT Broker: Common Bus for Everything
MQTT is a message exchange protocol that has become the de facto standard in smart homes. You need it not for itself, but because almost all interesting things communicate through it:
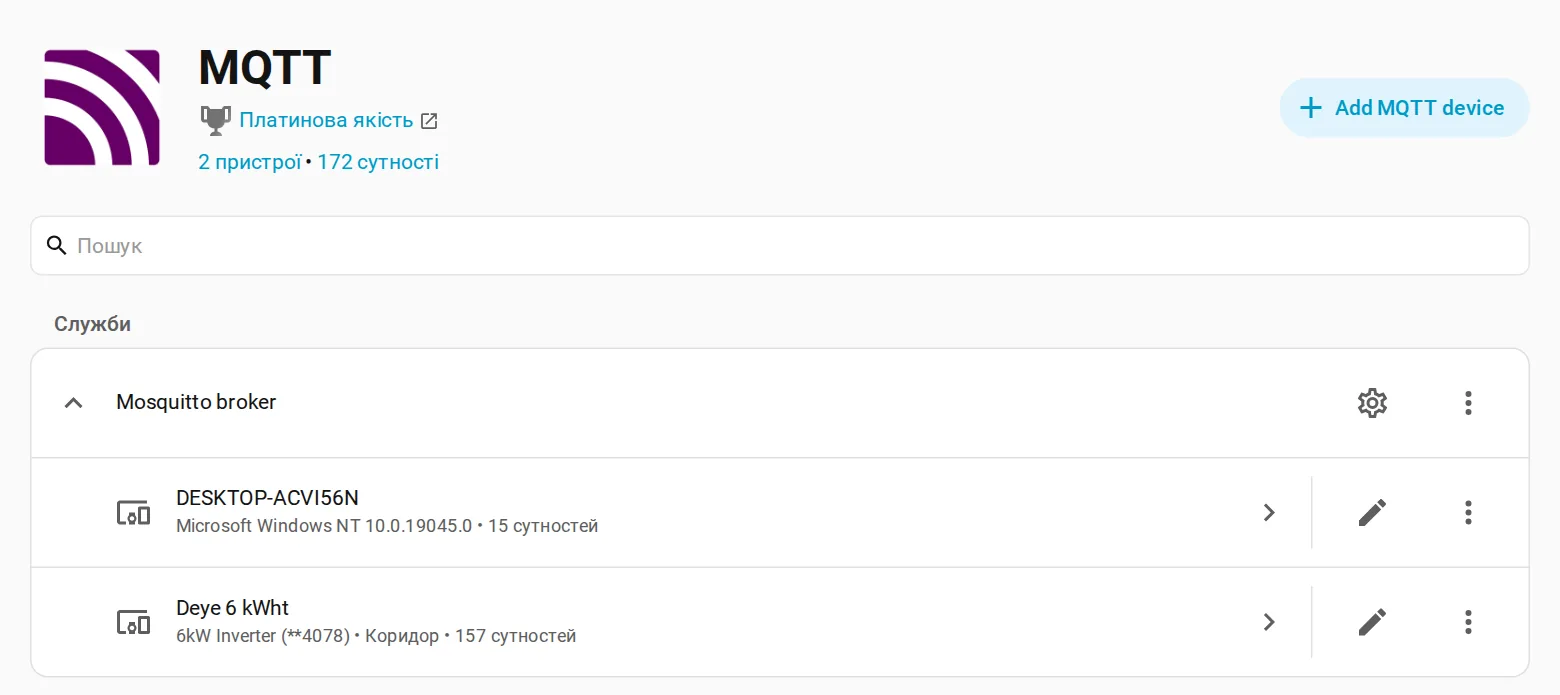
- Zigbee2MQTT — Zigbee devices without the manufacturer's proprietary gateway;
- ESP devices and Bluetooth presence detection systems;
- inverter — an add-on polls it via Modbus and publishes readings to MQTT;
- battery BMS — via an ESP32 bridge.
The broker is installed as the Mosquitto broker add-on from the store. After launch, Home Assistant will find it itself and offer to configure the MQTT integration — agree, no manual parameters need to be entered.
Create a separate Home Assistant user for MQTT clients and do not use your owner account — this is a small detail that is difficult to rework later when you have a dozen clients.
Presence via Router
The first truly useful thing to teach the system is to understand if someone is home. The most reliable basic method doesn't require any sensors: the router already sees all phones.
Home Assistant has a built-in integration for MikroTik. It's added via Settings → Devices & Services → Add Integration, requiring the router's address and a separate user with read permissions.
Three things without which it won't work
- Entities are disabled by default. After adding the integration, device tracking is created but in a disabled state. You need to go into the device, find the necessary entities, and enable them manually. This is where most people stop.
- Enable Force DHCP and ARP ping in the integration settings, and set the timeout to about 300 seconds. Otherwise, a phone that has put Wi-Fi to sleep will "leave home" every few minutes.
- Fill in DHCP lease comments in Latin characters without spaces — entity names are formed from them. Otherwise, you'll get a list of MAC addresses where nothing is clear.
What to expect from accuracy
Wi-Fi presence triggers when the phone actually connects to an access point. In our case (a first-floor apartment), the transition to the "home" state occurs near the door, not in the parking lot — the signal at the entrance is still too weak for a stable connection.
Practical conclusion: do not build scenarios based on Wi-Fi presence that need to trigger before your arrival (e.g., preheating). For "greet at home" — it's suitable; for "prepare for arrival" — GPS zones in the app are needed.
And one more thing: combining several access points into a single managed network is not always successful — older and newer MikroTik models may be incompatible with each other in centralized management mode. Check compatibility before purchasing a second access point, not after.
Hybrid Inverter: The Most Valuable Integration
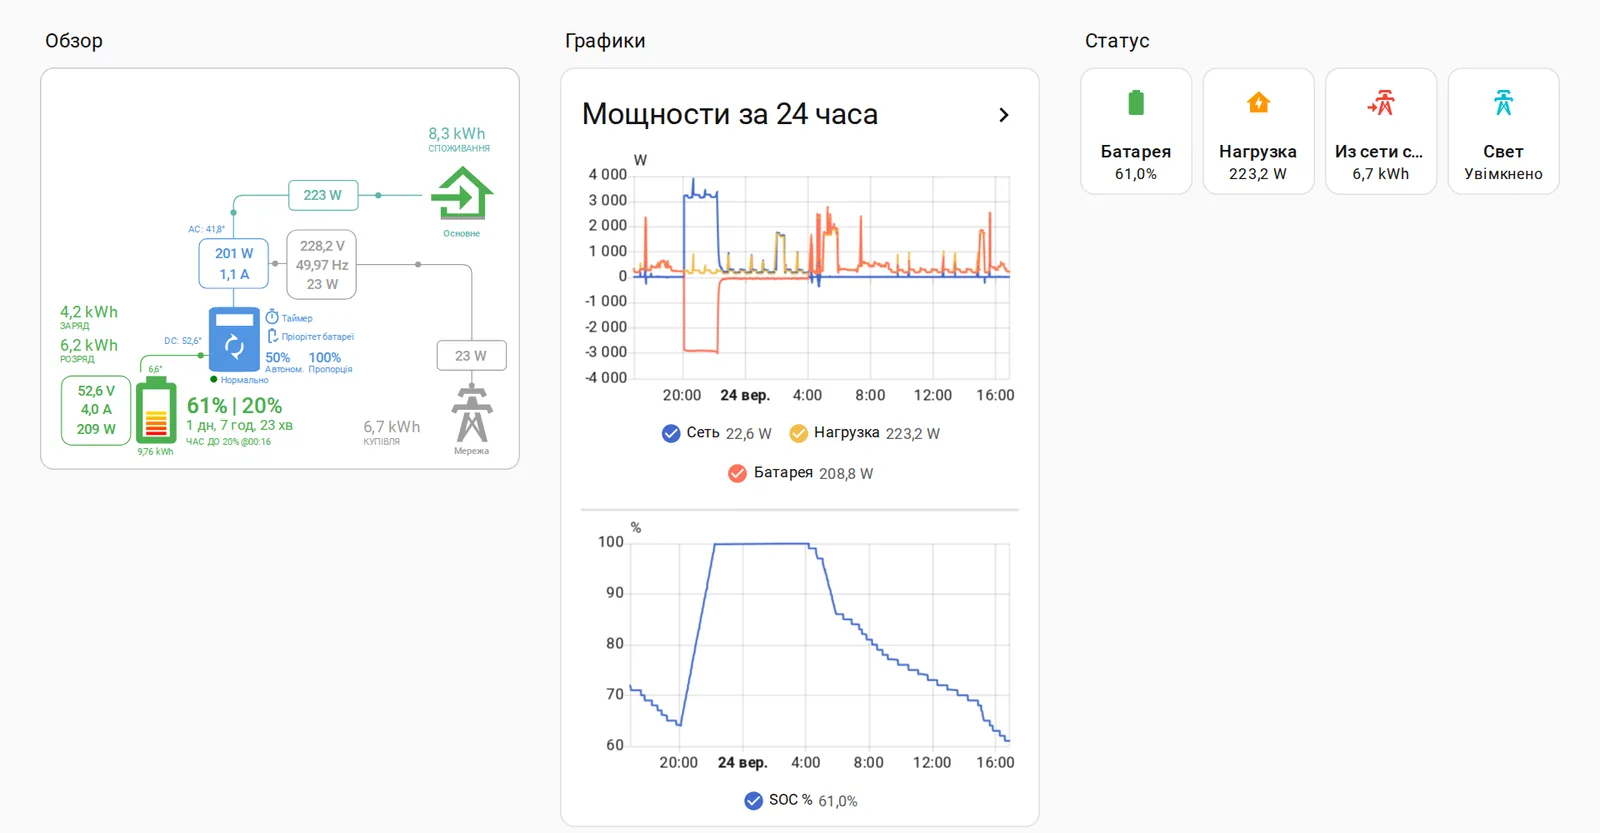
If a hybrid inverter with a battery is installed in the house, this is the most valuable thing you can integrate into Home Assistant. Not for the sake of beautiful graphs, but because proper charge management pays off monthly.
Physical Connection
Inverters communicate via Modbus RTU over RS-485. An USB → RS-485 adapter is needed from the server to the inverter. There's a nuance here that wastes time: cheap adapters based on nameless chips work unstably — the connection drops after hours or days.
Get an adapter based on the FT232 + MAX485 combination. It's a couple of hundred hryvnias more expensive and simply works. The cable is a twisted pair, lines A and B; it makes sense to keep the length to the inverter minimal.
Software Part
Polling is handled by a separate add-on (for Deye inverters and compatibles — the sunsynk family add-on). It reads Modbus registers and publishes readings to MQTT — the same broker you've already set up. Home Assistant retrieves them from there and converts them into entities.
What will appear in the system after connection:
| Indicator | Purpose |
|---|---|
| Battery charge, % | Main condition for almost all energy scenarios |
| Grid availability | Reaction to outages: what to turn off, what to notify about |
| Daily consumption from the grid | Accounting and control of automation effects |
| Grid charge permission | Controllable parameter — with it, we enable night charging |
| Inverter schedule timer | Enables or disables the inverter's own schedule |
Tariff Zones and Night Charging
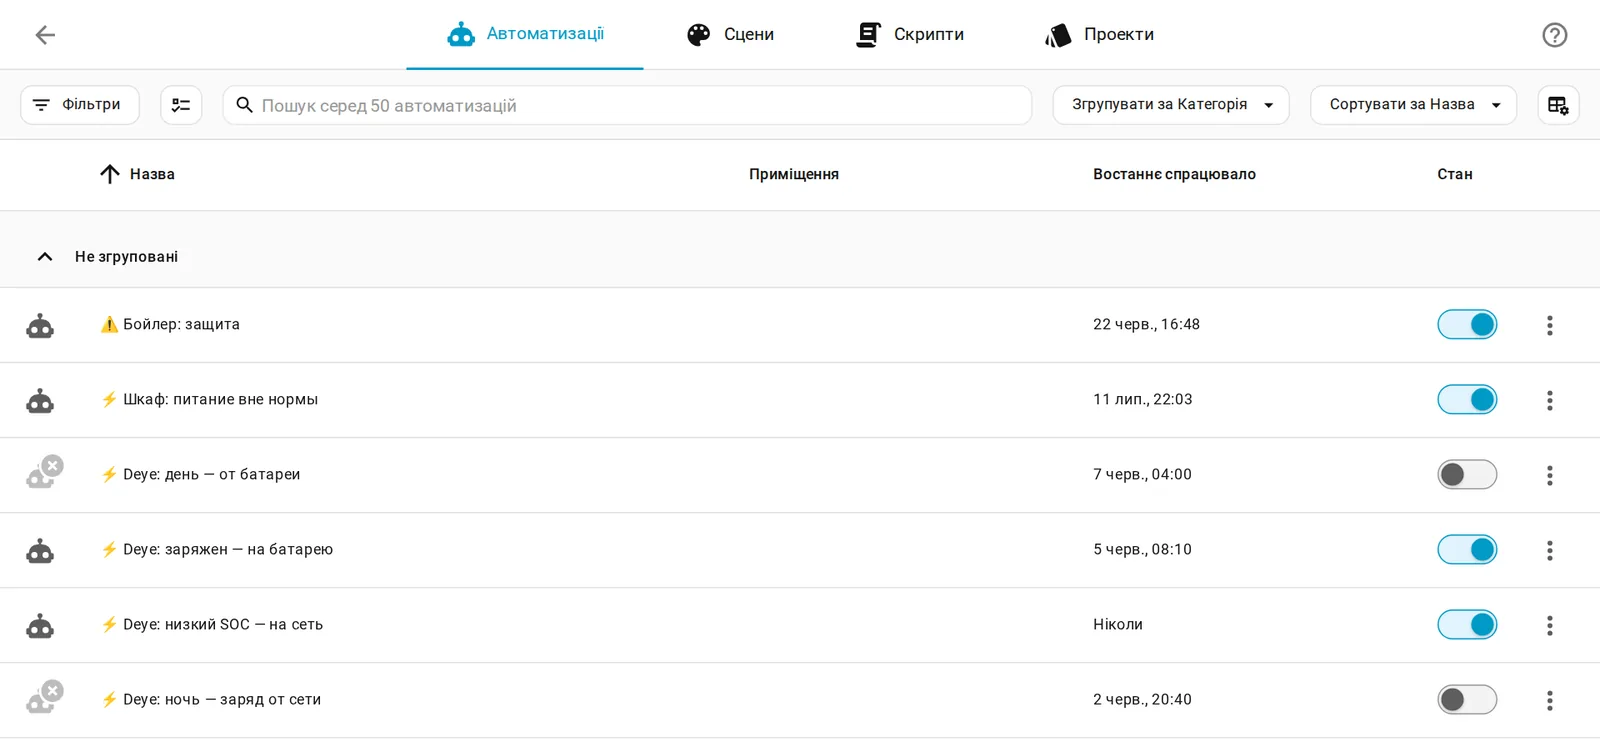
This is where the money appears. A two-zone tariff provides a night rate approximately twice cheaper than the day rate. Task: charge the battery at night, and power the house from it during the day.
Accounting
Create helper variables for day and night rates and night zone boundaries — then, when tariffs change, you'll edit a number in the interface instead of digging into the config. Template sensors are built upon them: current tariff, current tariff zone, and cost of daily grid consumption.
This is not cosmetic: without a cost sensor, you won't see if the automation had an effect, and you'll be arguing with feelings instead of numbers.
Charge Management
There's a fork here, and it's worth knowing about in advance.
- The schedule on the inverter itself (TOU) handles daytime discharge well: set programs on the display — and the house is powered by the battery during the day.
- Night charging is better left to Home Assistant. The inverter's own schedule charges incorrectly: sometimes it undercharges, sometimes it draws from the grid outside the night zone. It's more reliable to disable the inverter's timer and use a separate automation to enable grid charge permission at the start of the night zone, and disable it in the morning.
Both schemes are functional; they should be combined consciously: if both the inverter's timer and automation simultaneously control charging, they will conflict, and the behavior will become unpredictable. Choose one source of truth for each mode.
What This Provides
| Indicator | Before | After |
|---|---|---|
| Grid consumption | ≈12.8 kWh/day | ≈4.7 kWh/day |
Approximately 63% of daily consumption is shifted to the battery and night tariff. The equipment is the same — the logic has changed.
One More Detail: Export Limitation
If you don't plan to sell surplus to the grid, enable zero-export mode with a current transformer on the incoming wire. Otherwise, the inverter will export surplus for free.
Common Pitfalls at This Stage
- An entity whose name starts with a digit cannot be addressed in templates using dot notation — it must be accessed via square brackets. Simply make it a naming habit: do not start names with digits.
- Accumulative metrics sometimes throw "non-strictly increasing" value warnings into the log. For some inverters, this is a known export characteristic, not a malfunction.
- Telegram notifications in recent versions are configured via the interface, not in YAML. Old instructions from forums no longer work in this regard.
- Do not rely on cloud integrations for critical scenarios. Everything that controls power, water, and heating must work without an internet connection.
Part Two Checklist
- A habit has been formed: copy → edit → configuration check → restart
- Secrets are moved to
secrets.yaml, no duplicate root keys - HACS is installed
- MQTT broker is running, a separate user is set up for clients
- Presence detection via router is enabled, entities are manually activated, lease comments are filled in
- Inverter is connected with a quality RS-485 adapter, readings are coming into Home Assistant
- Tariff helpers and a daily cost sensor are set up
- One charge control scheme has been selected and tested over a real day
In the next part – custom sensors on ESPHome: presence radars, illuminance measurement, LED strip control. And why the choice of framework depends on the specific chip you have in hand.
Do you need such a turnkey system – from the electrical panel and cable to configured scenarios? We design and install it. Engineer's visit – from 1,500 ₴ in Kyiv, this amount is credited towards the cost of work if ordered.